
Acoustic wall panels have become a popular choice for Australian homes and commercial interiors. Beyond their decorative appeal, they can help reduce sound reflections, making spaces feel more comfortable for conversations, work and everyday activities.
But if you’ve never installed them before, it’s natural to have a few questions. Can you attach acoustic panels directly to plasterboard? Is adhesive enough to hold them? What happens if your wall isn’t perfectly straight?
The installation itself isn’t necessarily complicated, but getting a professional-looking result requires careful planning. Accurate measurements, the right fixing method and consistent alignment can make the difference between a clean feature wall and one with visible gaps or uneven slats.
This guide explains how to install acoustic wall panels step by step, from preparing the surface and cutting panels to choosing fixings and finishing the edges.
We’ll also use TrueBuild’s acoustic wall panel specifications to demonstrate how to calculate quantities and plan an installation.
How to Install Acoustic Wall Panels: Quick Answer
To install acoustic wall panels, measure and prepare the wall, cut the panels to size, and secure them using suitable construction adhesive or screws through the felt backing into an appropriate supporting structure. Use a spirit level to align the first panel, continue installing the remaining panels with consistent slat spacing, and finish the exposed edges if required.
For TrueBuild panels: Each panel measures 600 × 21 × 3000 mm and weighs 13.6 kg, so make sure your chosen fixing method can safely support the weight.
Can You Install Acoustic Wall Panels Yourself?
Yes, many decorative acoustic wall panels can be installed as a DIY project, particularly on a flat, structurally sound interior wall.
However, the difficulty depends on the size and weight of the panels, the wall material and the amount of cutting required.
For example, installing a few panels behind a desk may be relatively straightforward. Covering an entire wall with electrical outlets, corners and uneven surfaces requires more preparation.
Large panels can also be awkward to handle. TrueBuild acoustic wall panels measure 3000 mm in length and weigh 13.6 kg each, so having another person assist with positioning and supporting them is sensible.
Before deciding to install panels yourself, consider three things:
Wall condition: Is the surface dry, stable and capable of supporting the panels?
Installation method: Will you use suitable construction adhesive, mechanical fixings or a manufacturer-approved combination?
Cutting requirements: Can you safely trim the panels to the required dimensions using appropriate tools?
If the wall has significant damage, concealed services or uncertain structural support, professional assistance may be the better option.
Understanding TrueBuild Acoustic Wall Panel Specifications
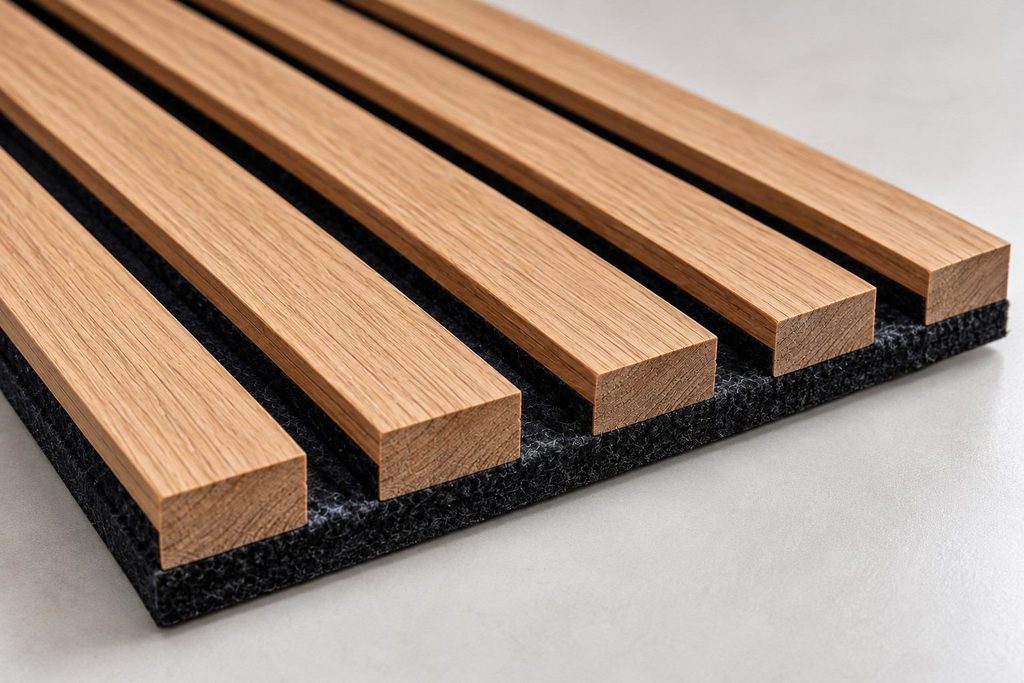
Before purchasing materials or measuring the wall, it’s important to know the actual dimensions and weight of the panels.
Different acoustic wall panels can vary considerably in construction, size and installation requirements.
TrueBuild acoustic wall panels have the following specifications:
| Specification | Details |
|---|---|
| Panel dimensions | 600 × 21 × 3000 mm |
| Width | 600 mm |
| Thickness | 21 mm |
| Length | 3000 mm |
| Weight | 13.6 kg per panel |
| Installation methods | Suitable construction adhesive or screws through the felt backing |
| Mechanical fixing | Into timber battens or an appropriate supporting wall structure |
| Edge finishing | Matching trims or exposed edges |
These dimensions make the panels suitable for creating large, continuous decorative wall surfaces.
However, the panel weight is an important installation consideration. At 13.6 kg each, five panels have a combined weight of approximately 68 kg.
That weight is distributed across the installation, but it highlights why the supporting wall and fixing system must be suitable.
An adhesive that works for a lightweight decorative tile may not be appropriate for a larger acoustic panel. Similarly, ordinary plasterboard fixings should not be assumed to provide adequate support without checking their load capacity and the complete installation arrangement.
Tools and Materials Needed for Acoustic Panel Installation
Having the correct tools ready before installation can save time and reduce the risk of mistakes.
For most decorative slatted acoustic panel installations, you’ll need a combination of measuring, cutting and fixing tools.
Measuring and preparation tools
A measuring tape is essential for checking wall dimensions and marking cutting points. A spirit level or laser level helps establish a straight starting position, while a pencil and straight edge make it easier to mark accurate cutting lines.
You may also need cleaning materials to remove dust and loose debris from the wall.
Cutting tools
Depending on the panel materials, a suitable fine-tooth saw may be required for trimming the decorative slats.
The felt backing may require a separate cutting method, such as a suitable utility knife.
Use only cutting tools appropriate for the specific panel construction. Confirm the recommended blade and cutting procedure before beginning.
Fixing materials
For adhesive installation, you’ll need a compatible construction adhesive and an appropriate application gun.
For mechanical installation, you’ll need suitable screws, a drill or screwdriver and any required wall anchors or timber battens.
Because panel weight and wall construction vary, fixing specifications should be selected for the actual installation rather than copied from another product.
Safety equipment
Wear suitable eye protection when cutting or drilling. Appropriate dust extraction and respiratory protection may also be necessary, particularly when cutting engineered wood materials.
For large panels, consider using a second person to help lift, position and support the material.
Step 1: Measure the Wall and Calculate How Many Panels You Need
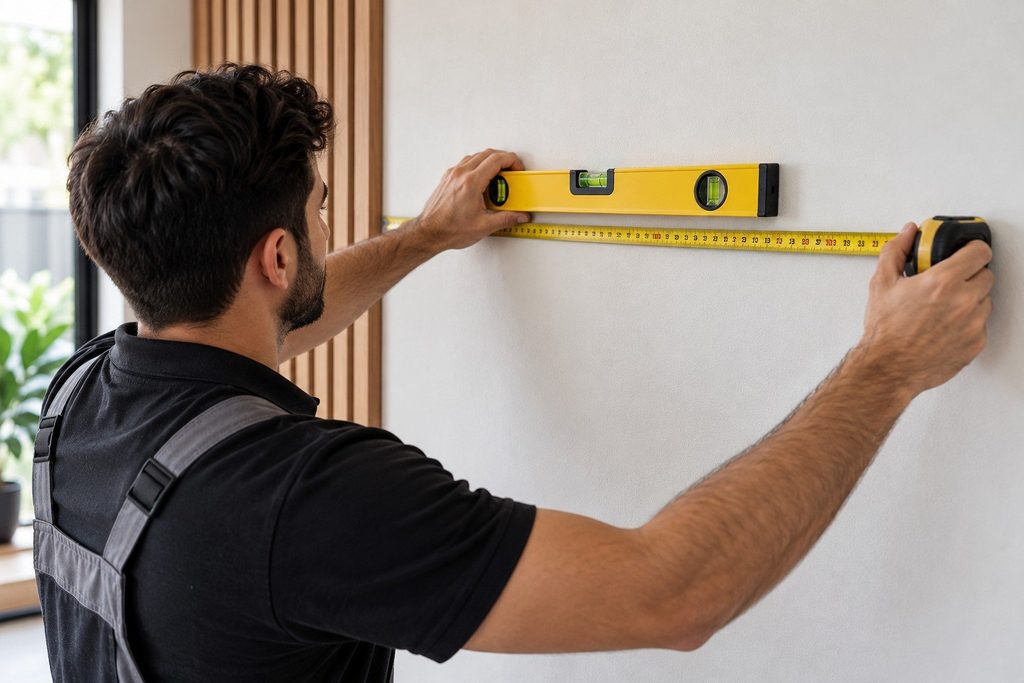
Measuring is one of the most important stages of acoustic panel installation.
An incorrect measurement can lead to unnecessary material waste, uneven edge pieces or gaps that become difficult to conceal.
Start by measuring the wall width at the top, middle and bottom. Older buildings may have walls that aren’t perfectly square, so don’t assume all three measurements will be identical.
Next, measure the height at several points across the installation area.
Record the measurements and identify the smallest available dimensions where necessary, while allowing for any clearances required by the installation system.
Example: Calculating TrueBuild acoustic panels
Suppose your wall measures:
- Width: 3000 mm
- Height: 2400 mm
TrueBuild acoustic panels measure 600 mm wide and 3000 mm long.
To calculate the approximate number of panels required across the wall:
Wall width ÷ Panel width = Number of panels
3000 mm ÷ 600 mm = 5 panels
Assuming the full nominal width is usable, five panels would cover the wall horizontally when installed vertically.
Because the panels are 3000 mm long, each would need to be trimmed to the required installation height.
What about cutting waste?
Not every wall will divide neatly into 600 mm sections.
For example, a wall measuring 3400 mm wide would require six panels across its width if the full 600 mm coverage width applies.
The final panel would need trimming.
Before cutting, consider whether starting with a narrower panel on one side would produce a more balanced appearance.
For complicated installations involving windows, doors or corners, sketch the wall and mark the position of each panel.
This makes it easier to estimate quantities and plan cuts before installation begins.
Step 2: Prepare the Wall Surface Properly
Even well-made acoustic panels can look uneven if the underlying wall hasn’t been prepared correctly.
The surface should be clean, dry, smooth and level before installation.
Begin by removing dust, loose paint and any material that could interfere with the fixing method.
Inspect the wall for cracks, moisture damage, loose plaster or uneven sections.
If you notice signs of water damage, investigate and resolve the cause before covering the wall with panels.
Preparing plasterboard walls
Plasterboard is common in Australian homes, but its suitability depends on its condition and the fixing system.
For adhesive installation, check that the surface coating and adhesive are compatible.
Freshly painted walls may need additional curing time before adhesive is applied.
For mechanical fixing, identify appropriate supporting structures, such as timber studs or securely installed battens.
Do not assume that screwing a heavy panel into plasterboard alone will provide adequate support.
Preparing brick or concrete walls
Brick and concrete surfaces can provide a solid substrate, but they may require different fixing materials.
Check for loose coatings, moisture and uneven areas.
Some installations may require masonry-compatible adhesive or suitable mechanical anchors.
If the wall is significantly uneven, a properly designed batten system may provide a more consistent mounting surface.
Check for electrical wiring and plumbing
Before drilling, locate concealed electrical cables, pipes and other services.
Take particular care around power outlets, light switches and plumbing fixtures.
If an outlet needs relocating or electrical work is required, use a licensed electrician.
Step 3: Plan the Layout Before Fixing Anything
Once the wall is ready, decide exactly how the panels will be positioned.
This is the stage where you can prevent awkward cuts and uneven spacing.
For a typical decorative feature wall, vertical installation creates a continuous slatted appearance from floor to ceiling.
However, the best orientation depends on the product’s permitted installation arrangement and the room’s design.
Establish a straight starting point
Use a spirit level or laser level to mark a vertical reference line.
Don’t rely entirely on the adjoining wall because it may not be perfectly straight.
If your first panel is slightly tilted, the error may become increasingly noticeable as you install more panels.
Plan the edge pieces
Work out where the final panel will finish.
If the last piece would be extremely narrow, consider adjusting the starting position.
For example, rather than placing five full-width panels and one very narrow strip, you might achieve a more balanced appearance by trimming panels at both ends.
The best arrangement depends on the wall width and the panel’s joining details.
Check the direction of the slats
Before installing, lay out the panels and check their orientation.
Look at the spacing between slats and how adjacent panels meet.
This is especially important for decorative panels where inconsistent spacing can interrupt the overall pattern.
A quick layout check before applying adhesive or drilling can prevent difficult corrections later.
Step 4: Cut the Acoustic Wall Panels to Size
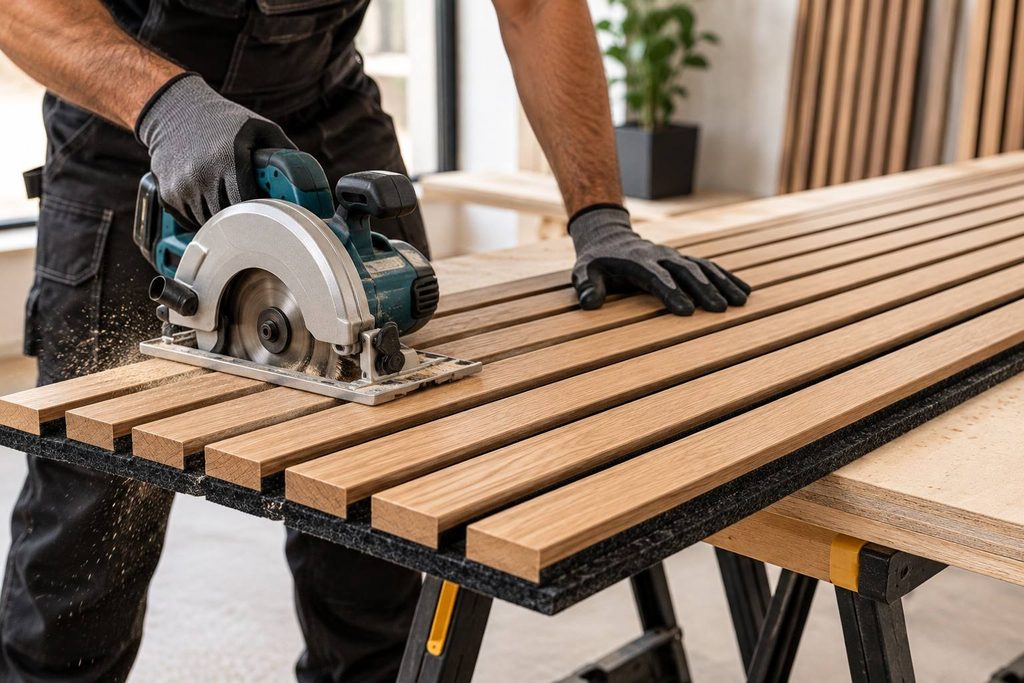
Once the measurements and layout are confirmed, the next step is cutting.
TrueBuild acoustic panels are 3000 mm long, so they may need trimming for rooms with lower ceiling heights.
For example, if the required installation height is 2400 mm, the panel will need to be shortened accordingly.
Before cutting, mark the measurement clearly and check it against the installation area.
How to achieve a cleaner cut
Place the panel on a stable, well-supported work surface.
Use a cutting tool and blade appropriate for the decorative slat material.
Cut steadily without forcing the blade, as excessive pressure can damage the panel surface or produce uneven edges.
If the felt backing requires separate trimming, use a method suitable for that material.
Always follow the manufacturer’s cutting instructions.
Cutting around corners and fixtures
Corners, doors and other architectural details may require additional trimming.
Measure each opening individually rather than assuming repeated dimensions are identical.
If you need to work around an electrical outlet, have the electrical requirements assessed by a licensed electrician before cutting or altering the installation.
Avoid making large cut-outs without planning how they will affect the panel’s support and appearance.
Protect the panel finish
Decorative acoustic panels are intended to remain visible after installation, so surface damage can be difficult to hide.
Protect the finished face during measuring, cutting and handling.
Remove cutting debris carefully before moving the panel into position.
Step 5: Choose the Right Fixing Method
There are two general fixing methods identified for TrueBuild acoustic wall panels: suitable construction adhesive and mechanical fixing through the felt backing.
The correct choice depends on the wall surface, supporting structure and installation conditions.
Because each panel weighs 13.6 kg, the fixing method must be capable of safely supporting the panel.
Method 1: Installing acoustic panels with construction adhesive
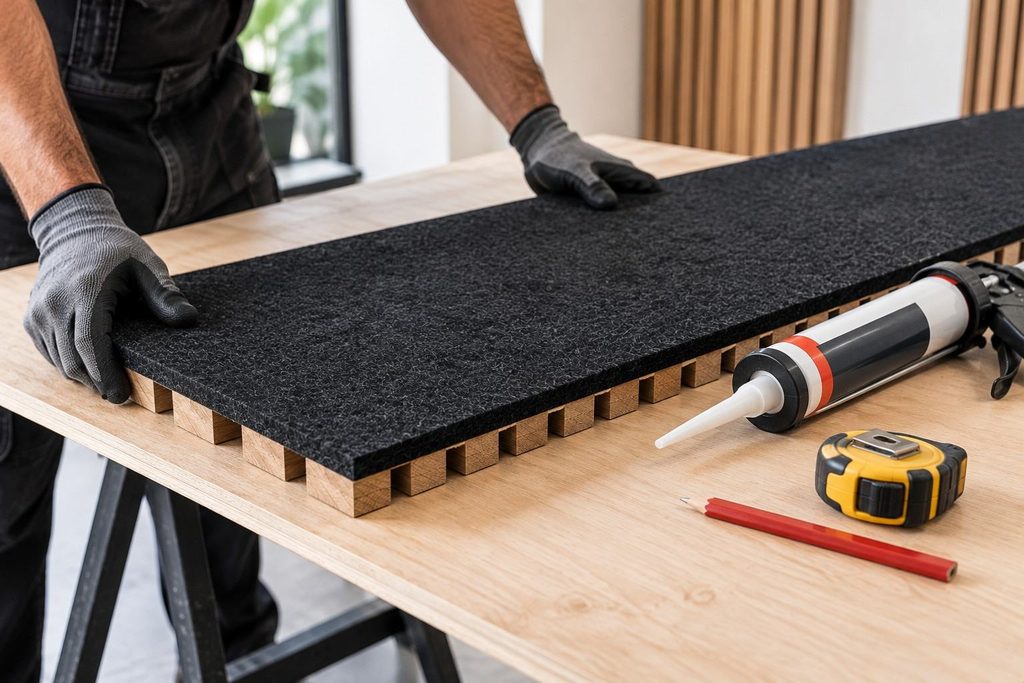
Adhesive installation can provide a clean appearance without visible mechanical fixings.
However, the adhesive must be compatible with the wall surface and panel backing.
Start by confirming that the wall is clean, dry and suitable for bonding.
Apply the adhesive to the back of the panel according to the adhesive manufacturer’s specified pattern and quantity.
Position the panel against your marked reference line.
Once correctly aligned, press it firmly against the wall.
Depending on the adhesive, temporary support may be required while the bond develops.
Do not remove any required support before the adhesive has reached the specified strength.
Important: TrueBuild’s general installation guidance permits suitable construction adhesive, but it does not identify a particular adhesive brand, application pattern or curing period. Confirm these details before installation.
Method 2: Installing acoustic panels with screws
Mechanical fixing provides another installation option.
TrueBuild panels can be secured using screws through the felt backing into timber battens or a suitable supporting wall structure.
Start by identifying the required fixing locations.
Position the panel against the reference line and confirm that it is level.
Install the appropriate screws through the felt backing into the supporting structure.
Take care not to damage the decorative slats or over-tighten the fixings.
The screw dimensions, number of fixing points and spacing must be suitable for the panel weight and wall construction.
Method 3: Installing panels over timber battens
A batten system may be useful when the existing wall isn’t suitable for direct installation or when a particular mounting arrangement is required.
Timber battens create a supporting framework onto which the panels can be fixed.
The battens must be securely attached to the underlying wall structure and arranged to provide adequate support.
A cavity behind acoustic panels can also affect their sound absorption characteristics.
However, any acoustic benefit depends on the complete system, including cavity depth, insulation and panel construction.
Do not assume that adding battens automatically improves performance in every installation.
Step 6: Install the First Acoustic Panel
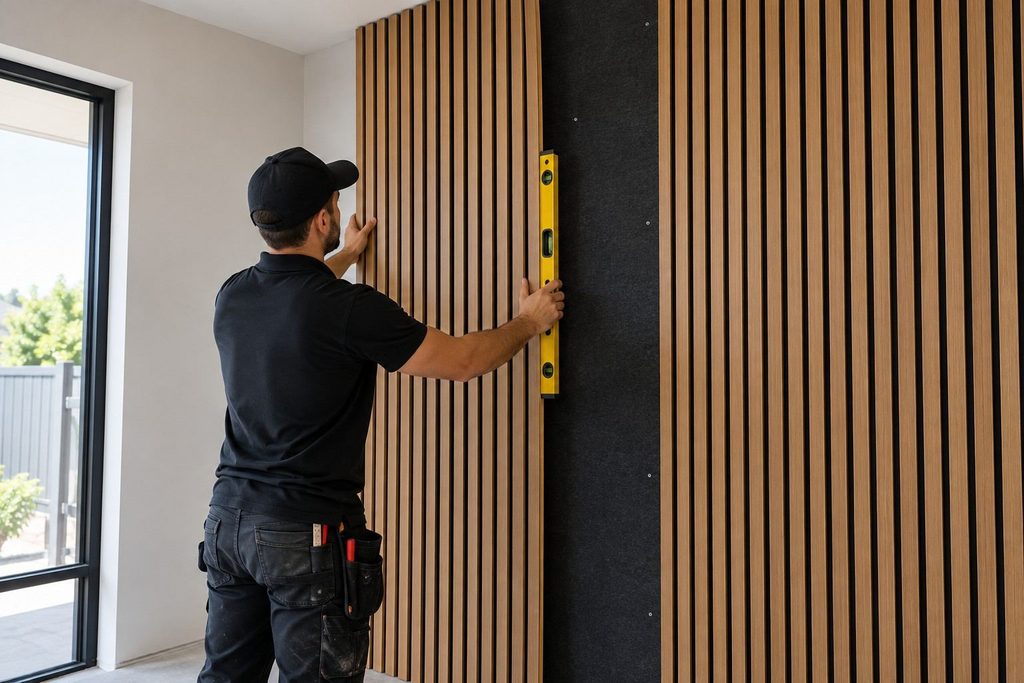
The first panel deserves extra attention because it establishes the alignment for everything that follows.
With the reference line already marked, carefully lift the panel into position.
For a large 3000 mm panel, having another person assist can make positioning easier and safer.
Check that the panel is correctly oriented and aligned with the reference line.
Also confirm that any required floor, ceiling or edge clearances have been maintained.
If using adhesive, position and support the panel according to the adhesive instructions.
If using screws, fasten the panel into the appropriate supporting structure.
Before moving on, check that the panel is stable and correctly aligned.
If you notice an issue, correct it now rather than trying to compensate with the next panel.
Step 7: Continue Installing the Remaining Panels
Once the first panel is securely positioned, continue across the wall.
Each new panel should follow the same alignment established at the beginning.
Pay close attention to the spacing between decorative slats.
Depending on the panel design, adjacent panels may have a particular joining arrangement intended to maintain a consistent appearance.
Follow that arrangement rather than forcing panels together.
Check alignment as you work
After installing each panel, check that it remains straight.
Small alignment differences can become more noticeable across a large wall.
Periodically step back and inspect the entire surface from a normal viewing distance.
Look for inconsistent joints, uneven slat spacing and sections that don’t sit flat against the wall.
What if the final panel doesn’t fit?
Measure the remaining space carefully.
Do not assume it matches the original calculation exactly.
Walls can be slightly uneven, and small variations may affect the final opening.
Mark the required cut on the last panel and trim it using the appropriate cutting method.
Check the fit before securing it permanently.
Step 8: Finish the Edges and Inspect the Wall
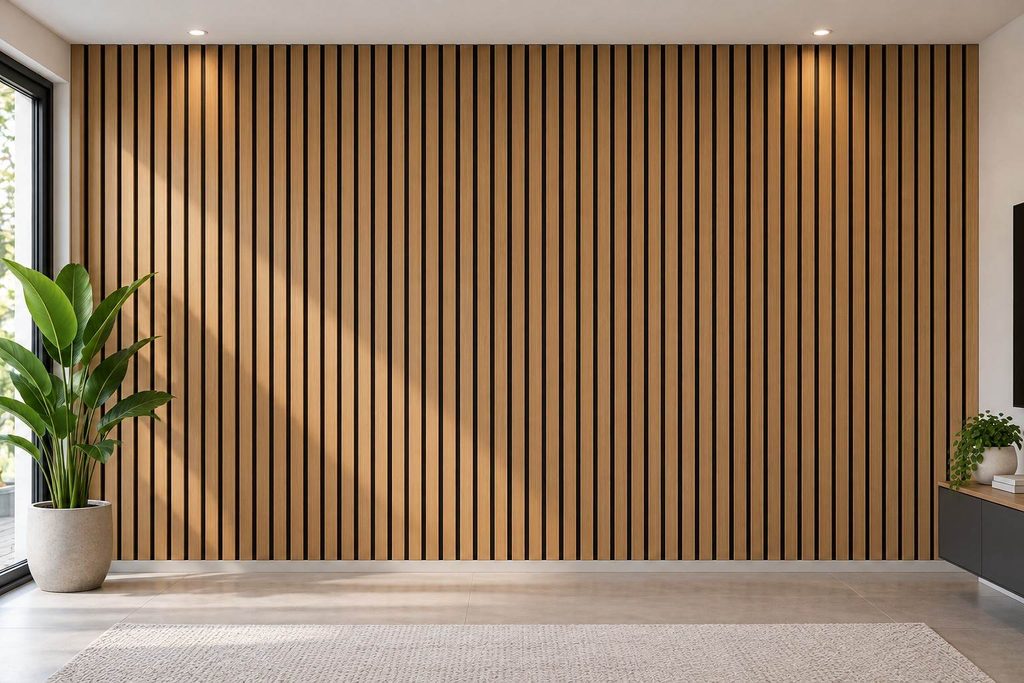
Once the panels are installed, the final stage is finishing.
Start by checking the exposed edges and joints.
Look for gaps, uneven cuts, damaged surfaces or loose sections.
TrueBuild acoustic panels can be completed with matching trims where required.
Alternatively, exposed edges can be left visible for a clean, contemporary architectural appearance.
The choice depends on the surrounding finishes and the desired design.
Inspect the installation
Check that all panels are properly secured.
Look along the wall from different angles to identify any areas that appear uneven.
If adhesive has been used, allow the full recommended curing time before putting the installation under additional stress.
Finally, remove installation dust using a cleaning method appropriate for the panel finish.
Avoid excessive moisture or harsh cleaning products unless approved by the manufacturer.
Common Acoustic Wall Panel Installation Mistakes
A few avoidable mistakes can affect both the appearance and durability of the finished installation.
Starting with an uneven wall
If the wall has significant irregularities, the panels may not sit flat.
This can create visible gaps or inconsistent joints.
Check the surface before installation and correct defects that could affect the finished result.
Using unsuitable adhesive
Not every construction adhesive is compatible with every panel backing or wall finish.
An unsuitable product may fail to bond properly or provide insufficient support.
Always confirm compatibility and load suitability.
Ignoring the weight of the panels
TrueBuild acoustic panels weigh 13.6 kg each.
That makes the supporting wall and fixing system important considerations.
Do not rely on unverified fixing arrangements.
Cutting before checking the layout
Cutting panels too early can create unnecessary waste.
Plan the full layout first, including corners, edges and architectural features.
Forgetting to check slat alignment
Decorative slatted panels depend on consistent spacing for their appearance.
Check the joins between panels throughout installation.
Expecting soundproofing results
Acoustic wall panels generally help absorb reflected sound within a room.
They are not designed to replace a complete soundproofing system.
If you’re trying to reduce noise travelling between rooms, read our guide to acoustic panels vs soundproofing.
Where Should You Install Acoustic Wall Panels?
Acoustic panels can be useful in many different interior spaces, but the best placement depends on the room’s purpose.
Home offices
Home offices often contain hard surfaces such as desks, windows and bare walls.
These surfaces can reflect sound and contribute to a less comfortable environment during video calls or conversations.
Acoustic panels can help manage some of those reflections while creating an attractive backdrop behind a workstation.
Bedrooms
A decorative acoustic wall behind a bed can introduce warmth and texture without requiring elaborate wall finishes.
Panels may also help reduce some sound reflections within the room.
However, they should not be expected to block noise from adjoining bedrooms or neighbouring properties.
Media rooms
Media rooms can benefit from carefully planned acoustic treatment.
Sound reflections from walls may affect listening clarity, particularly in rooms with minimal soft furnishings.
Acoustic panels can contribute to controlling those reflections, although the ideal placement depends on the room layout and speaker arrangement.
Hallways and entryways
Hallways often contain hard, reflective surfaces.
Decorative slatted panels can add visual interest while providing some sound absorption.
They can also create a feature wall without requiring large furniture or additional decorative elements.
Commercial offices
Meeting rooms, reception areas and shared workspaces may benefit from acoustic treatment.
In these environments, panels can help manage reflected sound while contributing to a consistent interior design.
For more design inspiration, explore our acoustic panel ideas for modern Australian homes.
Do Acoustic Panels Need an Air Gap?
An air gap isn’t always necessary.
Some acoustic panels are designed for direct wall mounting, while others may be installed over battens or a cavity.
The space behind a panel can influence how certain frequencies are absorbed.
In some systems, a cavity combined with suitable acoustic insulation can improve absorption performance.
However, the result depends on the panel construction, cavity depth and overall installation arrangement.
For this reason, it’s better to follow the manufacturer’s tested installation recommendations rather than assuming a larger air gap will always provide better sound absorption.
How Long Does Acoustic Panel Installation Take?
Installation time depends on the wall size, number of panels and complexity of the project.
A small feature wall with minimal cutting may be completed within several hours by an experienced installer.
A larger wall with corners, outlets and multiple cut-outs will generally require more time.
Wall preparation can also affect the schedule.
If the surface needs repairs or additional supporting battens, allow time for that work before installing the panels.
Adhesive curing time is separate from the installation itself.
Even if the panels appear securely positioned, follow the adhesive manufacturer’s specified curing period before removing temporary supports or placing stress on the installation.
How to Maintain Acoustic Wall Panels
Once installed, decorative acoustic wall panels generally require relatively simple maintenance.
Dust can collect between the slats over time, particularly in high-traffic spaces.
Use a soft cloth or suitable vacuum attachment to remove surface dust.
Avoid soaking the panels or using abrasive cleaning products.
If marks appear, follow the cleaning recommendations for the panel finish and backing materials.
It’s also worth inspecting the installation occasionally for loose edges or damaged sections.
If a panel becomes loose, investigate the fixing method rather than simply applying more adhesive without checking the cause.
Final Thoughts
Installing acoustic wall panels is a practical way to improve the appearance and acoustic comfort of an interior space.
A successful installation begins with careful measurements and proper wall preparation. From there, choosing the correct fixing method and maintaining consistent alignment are the most important steps.
For TrueBuild acoustic wall panels, the 600 × 21 × 3000 mm dimensions and 13.6 kg panel weight should be considered when planning material quantities, cutting and fixing arrangements.
Whether you’re creating a home office feature wall, refreshing a bedroom or upgrading a commercial interior, taking the time to plan the installation can make a noticeable difference to the finished result.
If you’re comparing finishes for your next project, explore TrueBuild’s acoustic wall panel collection or read our guide on how to choose acoustic panels for your home or office.
Disclaimer: This guide provides general installation information. Always follow the product manufacturer’s instructions and relevant Australian building and electrical requirements. Seek professional advice where the wall construction, fixing method or installation conditions are uncertain.